
etherkit’s OpenBeacon is the first kit to be offered by proprietor Jason NT7S and I think it’s a good one for him to open up with. Sure, it’s not the first QRSS transmitter kit on the market but unless I’m missing something (and I don’t believe that I am) it is the most versatile one offered to date. Here is a list of all the modes that it can transmit:
- Dual Frequency CW with 3, 6, 10 or 120 second dits (3 second DFCW is the most commonly used QRSS mode on the HF amateur bands and is the default mode programmed into OpenBeacon)
- QRSS CW with 3, 6, 10 or 120 second dits
- Regular CW (you choose the speed)
- Sequential Multi-Tone Hellschreiber
- WSPR – billed as an experimental mode, but I’ve used it with success
- Glyphcode – a mode that uses Hellschreiber to generate dots and dashes
- A special calibration mode that is useful for setting the center-frequency and bandwidth of your transmitted signal
There are no jumpers for mode-switching. It’s all done with the software client that is available for Windows, Linux and Mac OS X. This software control opens the door for anyone who wishes to come up with their own code to control OpenBeacon (and hopefully share it with other users in the etherkit OpenBeacon forum.)
First things first. Here’s what you get:

In this shot, I took the rather good-looking PCB out of it’s wrapping so you can see it a bit better:

Construction is straightforward. If you’re new to kit assembly and the art of soldering, it may take a little longer to figure out. The usual guidelines apply – identify all the parts, and don’t solder anything into the board until you’re sure that it’s the right part, and you’re soldering it in with the correct orientation. There are useful checks included at several points during the build and after the first stage has been completed, you get to connect the board to a USB cable and see your computer recognize the OpenBeacon. If you’re running Windows, you’ll need to install a driver before this can be accomplished, but it’s reassuring to have the project recognized by your computer at such an early stage of construction.
Here’s the finished board:
And another view of the completed board:

Apologies – I forgot to include a rule in the pictures to give you an idea of the size of the board, so for the record, it measures 70mm x 90mm.
One thing I really like about OpenBeacon is the on-board connectors. Once you’ve finished assembling it, you can plug in a USB cable and an antenna, program it with your call-sign and you’re on the air. If you want to run higher RF output power than the approximately 40mW max you get from USB power, then you can plug in DC power to the on-board DC power connector and get about 300mW from a 13.8V supply. These kinds of QRSS transmitters are often not installed in conventional enclosures anyway, so it’s really good to be able to begin experimenting with OpenBeacon straight off the bat.
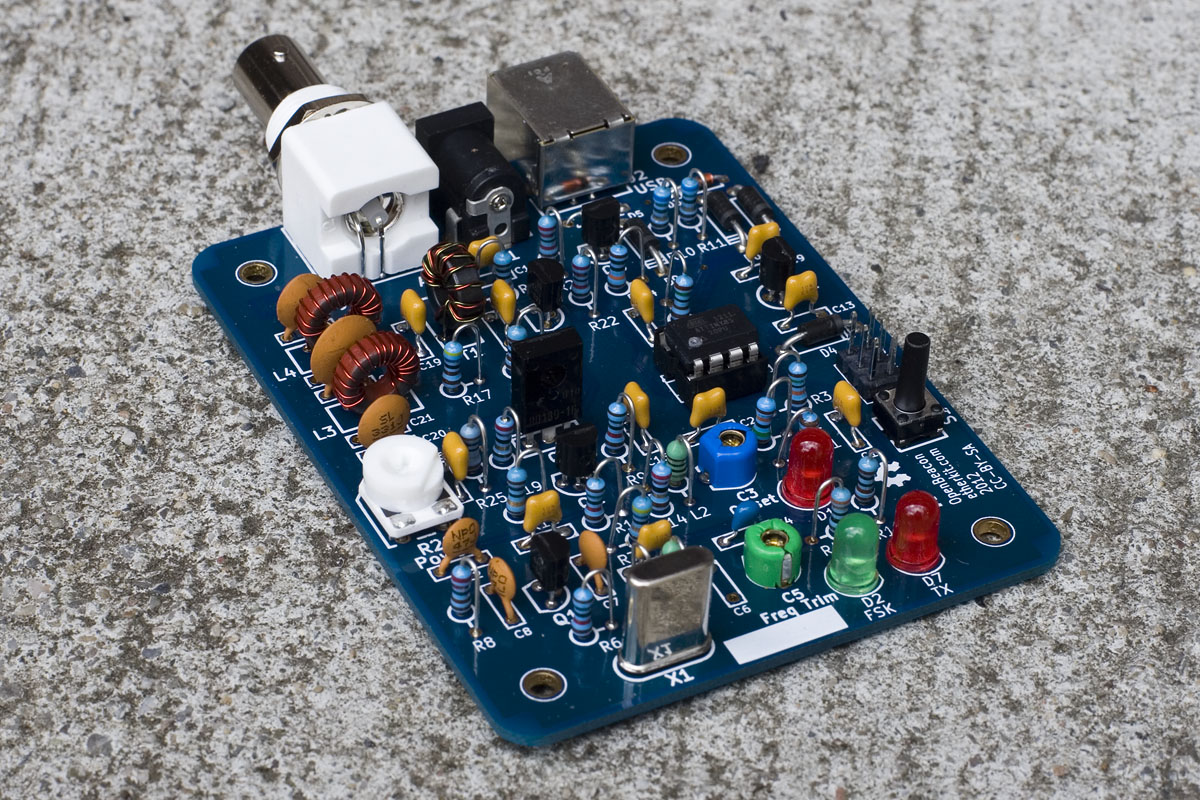
This is a bit gratuitous, but here’s a really close-up view of part of the board:

If you don’t already have a QRSS viewer, Argo is the easiest to set up and get going with. OpenBeacon is already set to transmit in QRSS3 as the default mode, but you will need to program it with your callsign by downloading the client for your particular operating system and following the directions on the etherkit site. If you have problems with any of this, Jason NT7S, or one of the etherkit forum members should be able to help you out.
Of course, the first thing you want to do with a transmitter like this is to see what your QRSS signal looks like on your own viewer:

The very next thing was to see what my callsign looked like in Multi-Tone Sequential Hellschreiber:

You’ll notice that the vertical scale on my Argo screen captures is calibrated with the frequency. To achieve this, you’ll need to accurately calibrate your receiver so that you can set it to 10139 KHz. In my case, I know that after it has been running for a while, my K2 receives at about 10Hz lower than the dial frequency, so to receive on 10139 KHz I set my K2 to 10139.01. The next step is to enter an offset of 10139000 in the calibration menu and you’re all set. The QRSS band normally runs from 10140 to 10140.1, so a carrier in the center of the QRSS band will produce a tone of 1050 Hz in the speaker of your receiver.
One thing that’s very important to remember if you run into any difficulties during assembly –

Incidentally, before anyone suggests that I was illegally radiating a signal without proper identification, the above screen capture was taken as a result of outputting 5mW from the OpenBeacon into a 50 ohm dummy load – not too much radiating was taking place.
I did run OpenBeacon for one night in QRSS3 mode but wasn’t able to find my signal on any grabbers. It was only one night and I was, after all, running just 5mW RF output (sucker for punishment here). I’ll be trying it again soon, but at the time I was keen to forge ahead and try the WSPR experimental mode. I did briefly have a go at figuring out Glyphcode but either the instructions in the Client Software Useage Guide on the etherkit site weren’t clear, or I was being a bit thick. It could well have been the latter. I’ve no doubt that Glyphcode isn’t hard to program but at the time, was more immediately interested in playing around with WSPR on OpenBeacon, so I hoofed it on forward to that section of the online guide.
To transmit a WSPR signal with OpenBeacon, you first have to load the buffer with the appropriate code. I downloaded wsprcode.exe and placed it in the root directory of my PC. This is a description of what I did on my PC running Windows. Your mileage will vary if you are running any other OS. In DOS at the command prompt I typed wsprcode “AA7EE CM87 7” You’ll need to do the same with your callsign, 4-digit locator and power level (in dBM). wsprcode will output the data symbols, sync symbols and channel symbols for your particular data – all you need is the last set of characters – the channel symbols. Cut and paste this data into a simple text editor (I used notepad on my PC) and edit it to erase all spaces between characters as well as any carriage returns so that all you are left with are 162 characters in a continuous string with no spaces (or anything else) between them.
The next step is to program the buffer of your OpenBeacon with the WSPR code. Using the OpenBeacon client software, the command for this is openbeacon wsprbuffer “flangesprocket” where flangesprocket represents the string of 162 channel symbol characters.
All that remains is to place OpenBeacon in wspr mode, adjust the transmission bandwidth to 10Hz, and the frequency to put you in the wspr band, and manually trigger OpenBeacon (either with S1 or through the client software) at the beginning of an even-numbered minute. OpenBeacon will transmit your wspr signal for the required 1 min 50 seconds.
Here are the unique spots representing 2 evenings of operation:
| Date | Call | Frequency | SNR | Drift | Grid | dBm | W |
by | loc | km | mi |
|---|---|---|---|---|---|---|---|---|---|---|---|
| 2012-05-28 02:36 | AA7EE | 10.140138 | -17 | 0 | CM87ut | +7 | 0.005 | K7LG | DM04se | 530 | 329 |
| 2012-05-28 02:20 | AA7EE | 10.140102 | -23 | 0 | CM87ut | +7 | 0.005 | VE6PDQ/1 | DO33fl | 1867 | 1160 |
| 2012-05-27 05:24 | AA7EE | 10.140108 | -22 | -1 | CM87ut | +7 | 0.005 | K7MSC | CN76wv | 1021 | 634 |
| 2012-05-26 07:20 | AA7EE | 10.140125 | -19 | 0 | CM87ut | +17 | 0.050 | W7WKR | CN98pi | 1179 | 733 |
| 2012-05-26 07:10 | AA7EE | 10.140144 | -16 | 0 | CM87ut | +17 | 0.050 | W5OLF | DM78hb | 1482 | 921 |
| 2012-05-26 06:20 | AA7EE | 10.140138 | -22 | 0 | CM87ut | +17 | 0.050 | K7UEB | DN06tb | 973 | 605 |
| 2012-05-26 05:34 | AA7EE | 10.140129 | -26 | 0 | CM87ut | +17 | 0.050 | VE6PDQ | DO34ir | 2000 | 1243 |
| 2012-05-26 04:36 | AA7EE | 10.140108 | -8 | 0 | CM87ut | +17 | 0.050 | KC6KGE | DM05gd | 390 | 242 |
| 2012-05-26 00:08 | AA7EE | 10.140114 | -16 | 0 | CM87ut | +17 | 0.050 | N6RY | DM13id | 688 | 428 |
Not a lot of unique spots, but I was only running 5mW. The first spots were reported as being 50mW, but this was my mistake – I was actually running just 5mW and corrected the wspr code as soon as I discovered my error. I decided to stick with an output power of +7dBM as that is the power I feed my diode ring mixers, and it just slightly blows me away that my signals were decoded by VE6PDQ over 1200 miles from me with the same power that my local oscillators put out. Quite amazing. I have no doubt that I’ll achieve even better DX if I keep at it. As I have developed an affinity for level 7 diode ring mixers, running a power output of +7dBM from the OpenBeacon seems very fitting.
Now, as etherkit is an open source amateur radio company, I’m hoping that someone will write a routine to automatically trigger OpenBeacon when in WSPR mode. It definitely seems to work quite well in that mode.
This is where I stand with my OpenBeacon so far, and I think it’s the most versatile MEPT available in kit form. It boasts many different modes and speeds (as well as WSPR) and to change between them you don’t have to fuss around with wire jumpers. It’s all done in software, like many other things in OpenBeacon. This ability to control it in software, along with the wide variety of modes, and the open-source nature of etherkit make it, in my opinion, the ideal MEPT for a lot of users.

Hi Dave,
Thanks for sharing your experience with the OpenBeacon kit.
I saw Jason at the Four Days in May gathering in Dayton.
He explained to me that the WSPR mode was experimental and that the OpenBeacon kit had to be tethered to a pc.
Now that I see yours in action I want one also! LOL
Al
N8WQ
Dave, what are the parameters for Hell on this board. Mine is running DFCW at moment. When I put i into Hell it just didn’t sound right at all. Perhaps I need to set the cw speed high?
Thanks,
Grover K7TP
Grover – will answer when I get a chance. In the meantime, try the etherkit OpenBeacon forum. That’s a good way to get hold of NT7S directly.
Grover – this is odd. When I first started using OpenBeacon, I just put it into hell mode and up popped my callsign on Argo in Hell. Now I’m trying it again and it’s not looking right. Not sure what I’m doing wrong. Will also post this on the etherkit forum – perhaps Jason can help.
Problem solved (at my end anyway). I wasn’t running Argo at a slow enough speed, so my callsign wasn’t displaying properly.
Hi Dave,
nice job. Got My OpenBeacon up on 10137000, Used QtRadio frontend, and connected to a server in Ohio, and heard the beacon! 100mw so it is getting out. Tried to get it working with WSPR, did the whole wsprcode thing loaded buffer, and just get a carrier when mode is set on.
Also tried qrss3 with Argo..cute !
73’s
Vince
N2AIE
Why cant i get my Openbeacon on WSPR…i followed the instructions ! :=((
Have you tried the etherkit forum Vince – or contacted NT7S? I’m sure he’ll be able to help you.
AA7EE, Could you please show us how you setup and build your projects with such neatness so that we can also learn how to do the same.
I have been following you and others on the regn receiver blog and also about to build hope fully in the next week or two.
73’s and Cheers David Grey
ZL1UTS
David –
Although I do make mention of the various techniques and methods that I use, I admit that you’d have to read through the text of many of my construction projects in order to glean most of the information. A blog-post dedicated to construction techniques and methods would be a good idea. I can’t promise you that I will do it anytime soon, but I hope to get around to it at some point.
73 for now – and thank you for taking the time to comment!
Dave
AA7EE
I’ve taken these on DX trip before and they are useful for propagation etc
I have used on several going back to 2012. I left one in 6W that worked for ages.
http://etherkit.github.io/openbeacon_landing_page and https://github.com/etherkit/OpenBeacon are must visit is want to make your own (there are gerbers in the PCB on github)
73
Dom
M1KTA